 Internet Connection Sharing from Mac OS X Ventura (13.x +) to Raspberry Pi 3B+/4

 This page describes how to share your Mac OS X wifi or ethernet network
connection from your PC with the Raspberry Pi 3B+/4.
Materials required for this connection will be a USB Type-A or Type-C to Ethernet
adapter and any length CAT 5/6/7 ethernet cable.
Apapter links are available below:
UGreen USB Type-A Ethernet Adapter
UGreen USB Type-C Ethernet Adapter
You will also need to know the Hostname of your Raspberry Pi as first
configured when you installed the 64-bit Raspberry Pi OS Lite version.
The Hostname should be your Seneca student e-mail id without the @myseneca.ca.
For example, student named Tom Swift may have an e-mail id of tswift2.
The example in this instruction uses voyagerPi.local.
STEP 1: Make sure your Raspberry Pi 3B+/4 is powered on
and is running 64-bit Raspberry Pi OS Lite. Use an available USB-C/USB-A port on your
Mac running Ventura (13.x) for the ethernet adapter and connect the ethernet cable from
the adapter to the ethernet port on the Raspberry Pi.
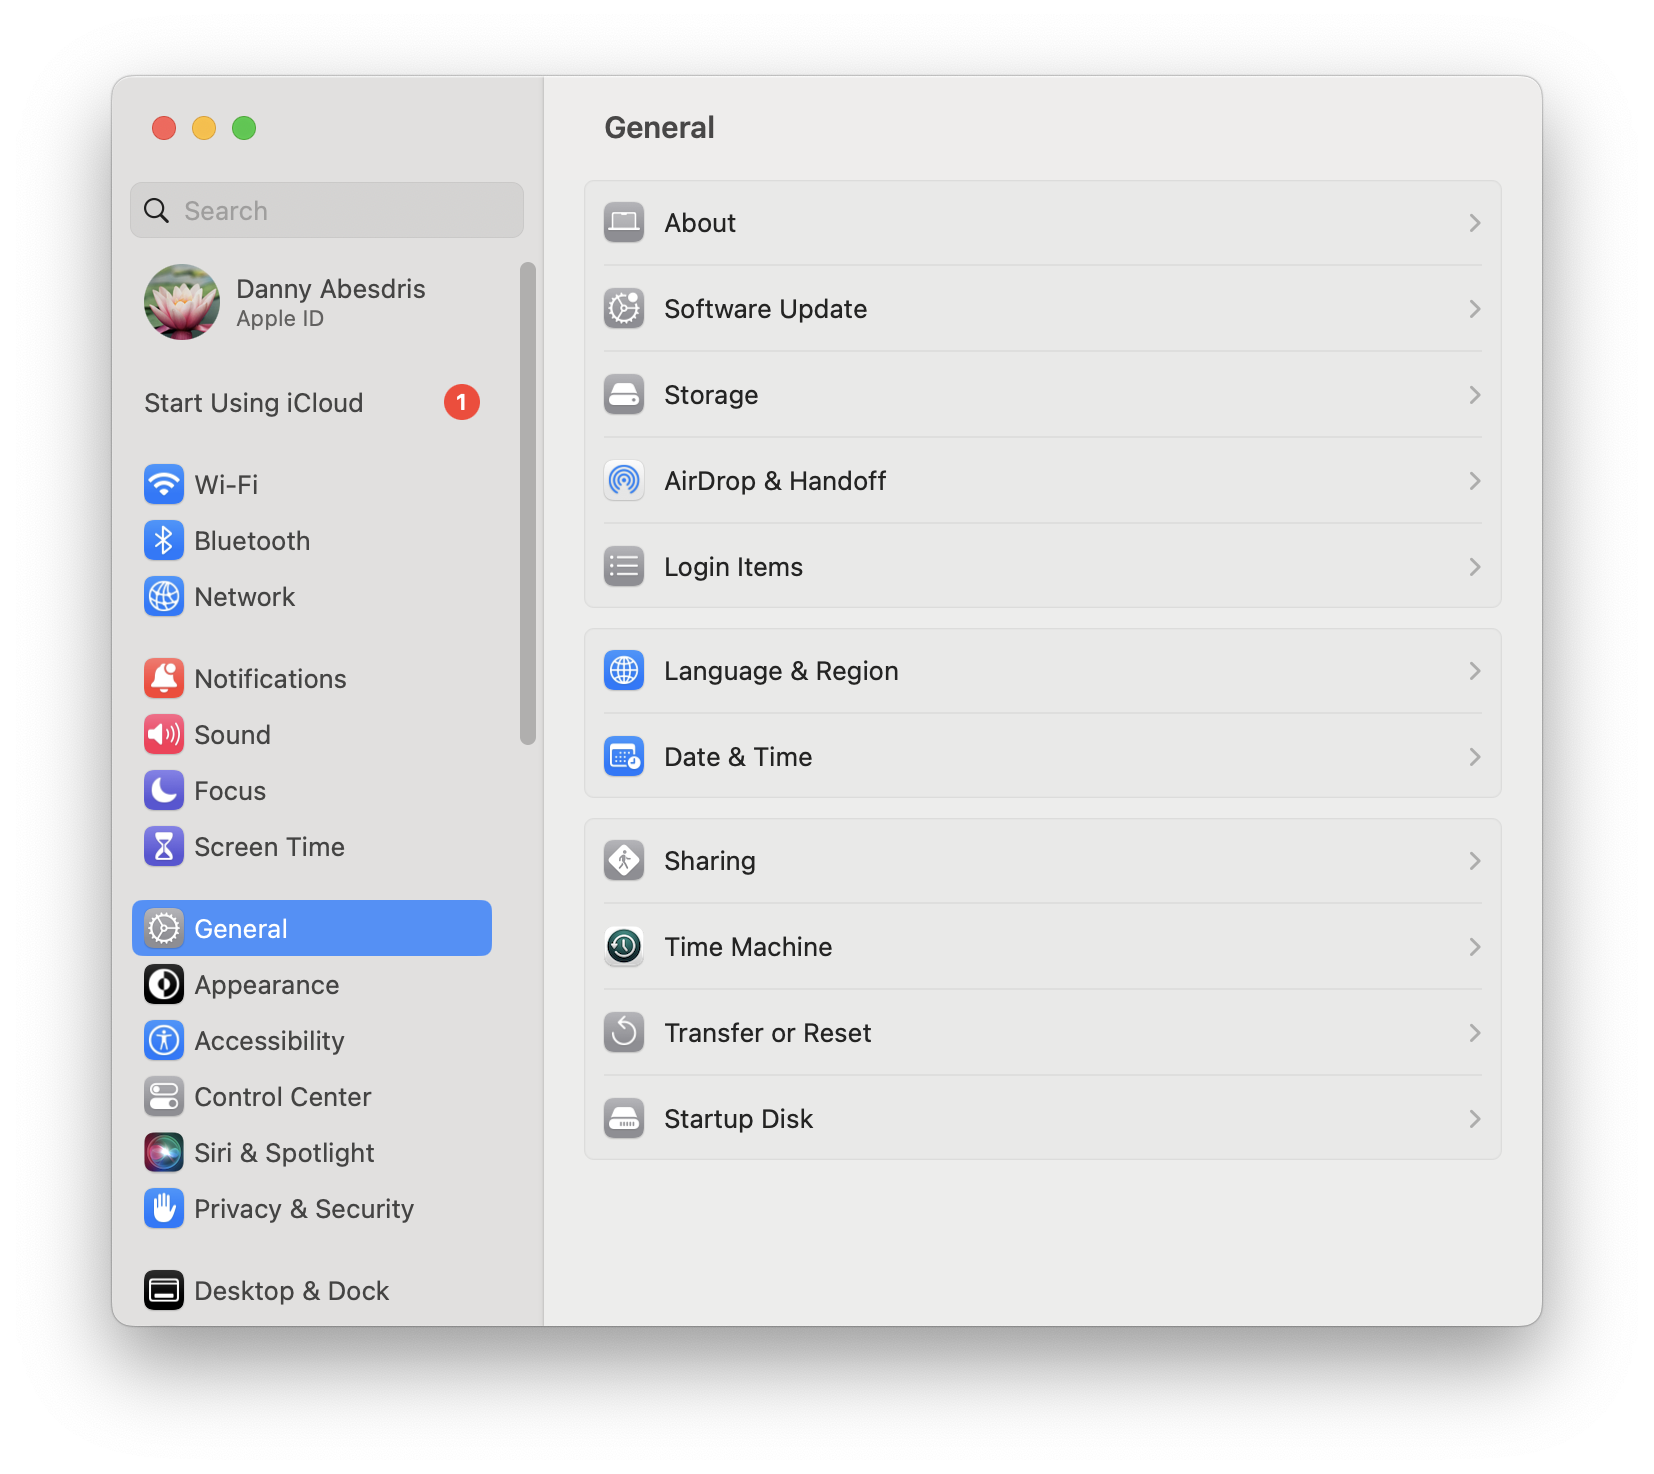
STEP 2: Navigate to the Apple menu and choose System Settings... and select General
from the left side panel.
This page describes how to share your Mac OS X wifi or ethernet network
connection from your PC with the Raspberry Pi 3B+/4.
Materials required for this connection will be a USB Type-A or Type-C to Ethernet
adapter and any length CAT 5/6/7 ethernet cable.
Apapter links are available below:
UGreen USB Type-A Ethernet Adapter
UGreen USB Type-C Ethernet Adapter
You will also need to know the Hostname of your Raspberry Pi as first
configured when you installed the 64-bit Raspberry Pi OS Lite version.
The Hostname should be your Seneca student e-mail id without the @myseneca.ca.
For example, student named Tom Swift may have an e-mail id of tswift2.
The example in this instruction uses voyagerPi.local.
STEP 1: Make sure your Raspberry Pi 3B+/4 is powered on
and is running 64-bit Raspberry Pi OS Lite. Use an available USB-C/USB-A port on your
Mac running Ventura (13.x) for the ethernet adapter and connect the ethernet cable from
the adapter to the ethernet port on the Raspberry Pi.
STEP 2: Navigate to the Apple menu and choose System Settings... and select General
from the left side panel.
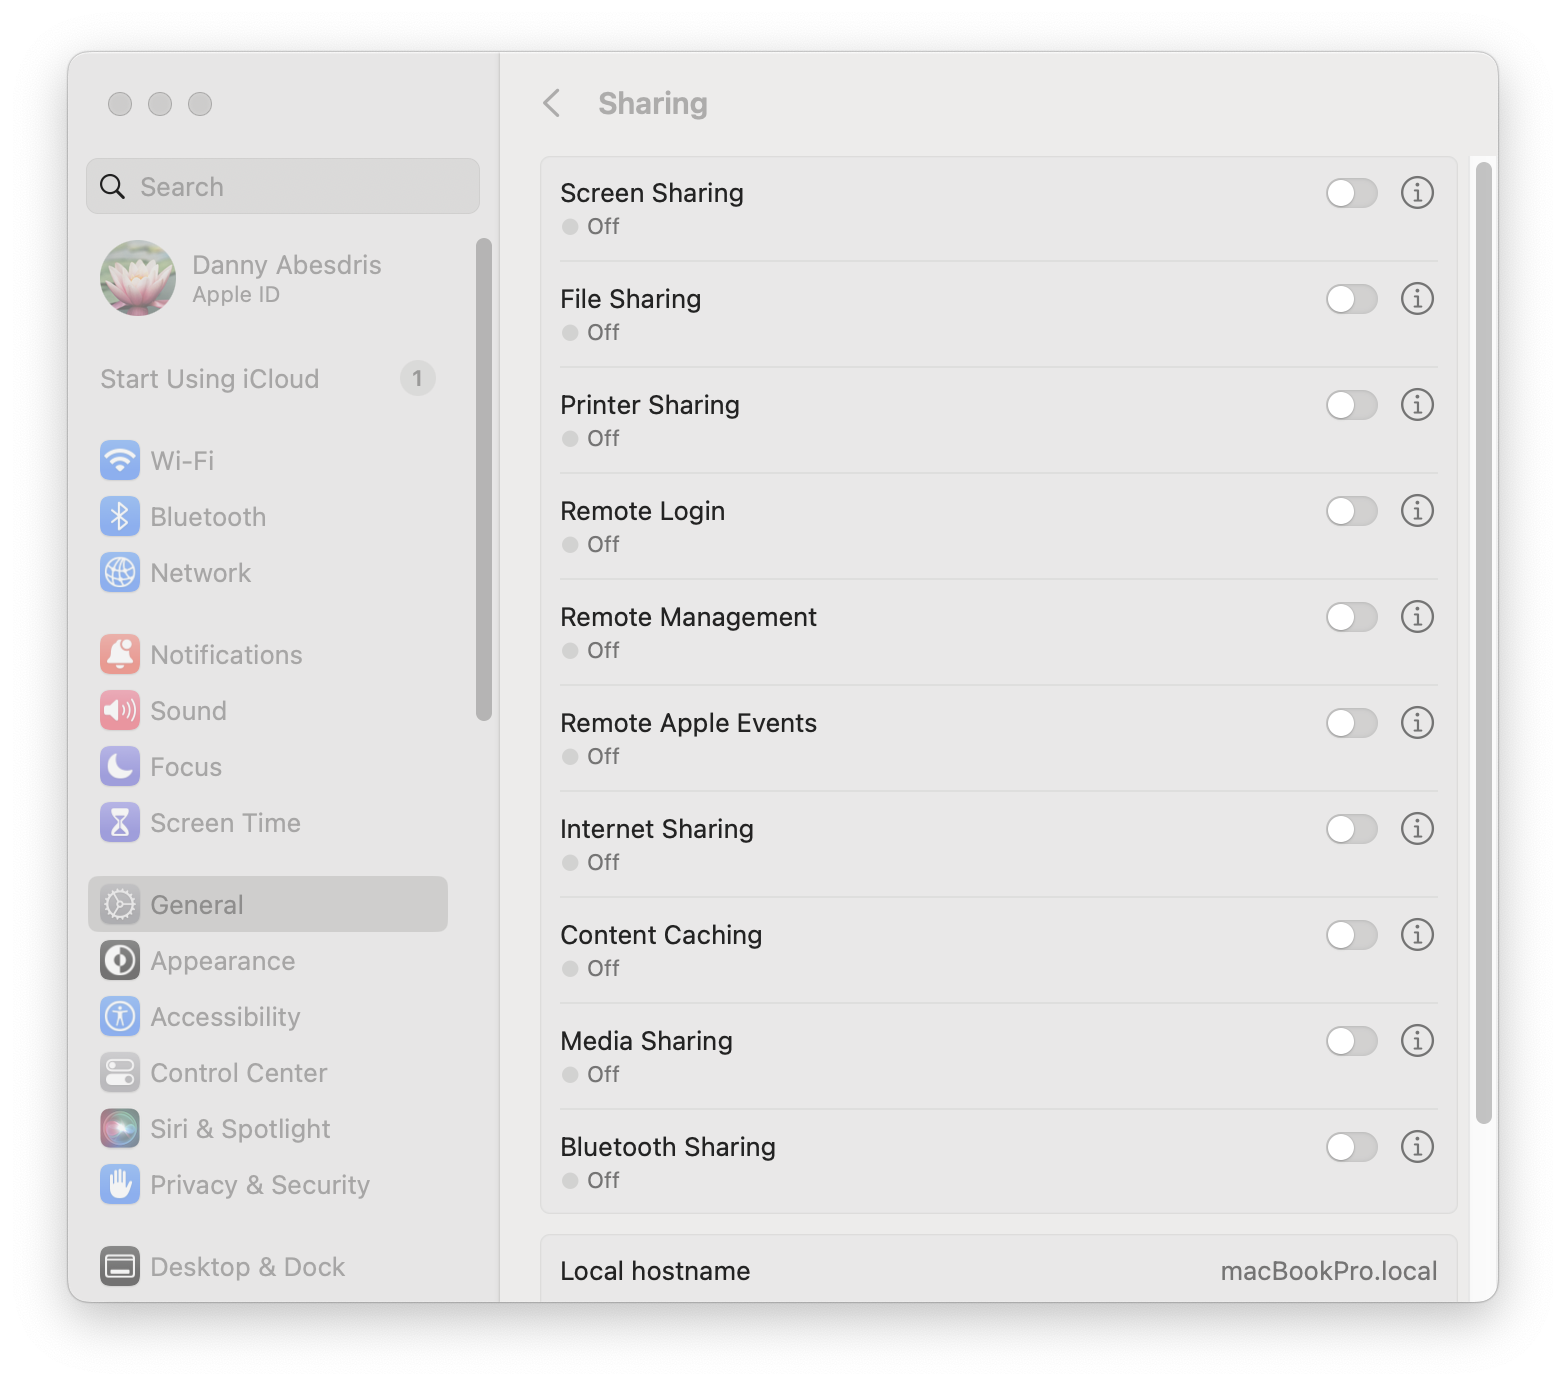
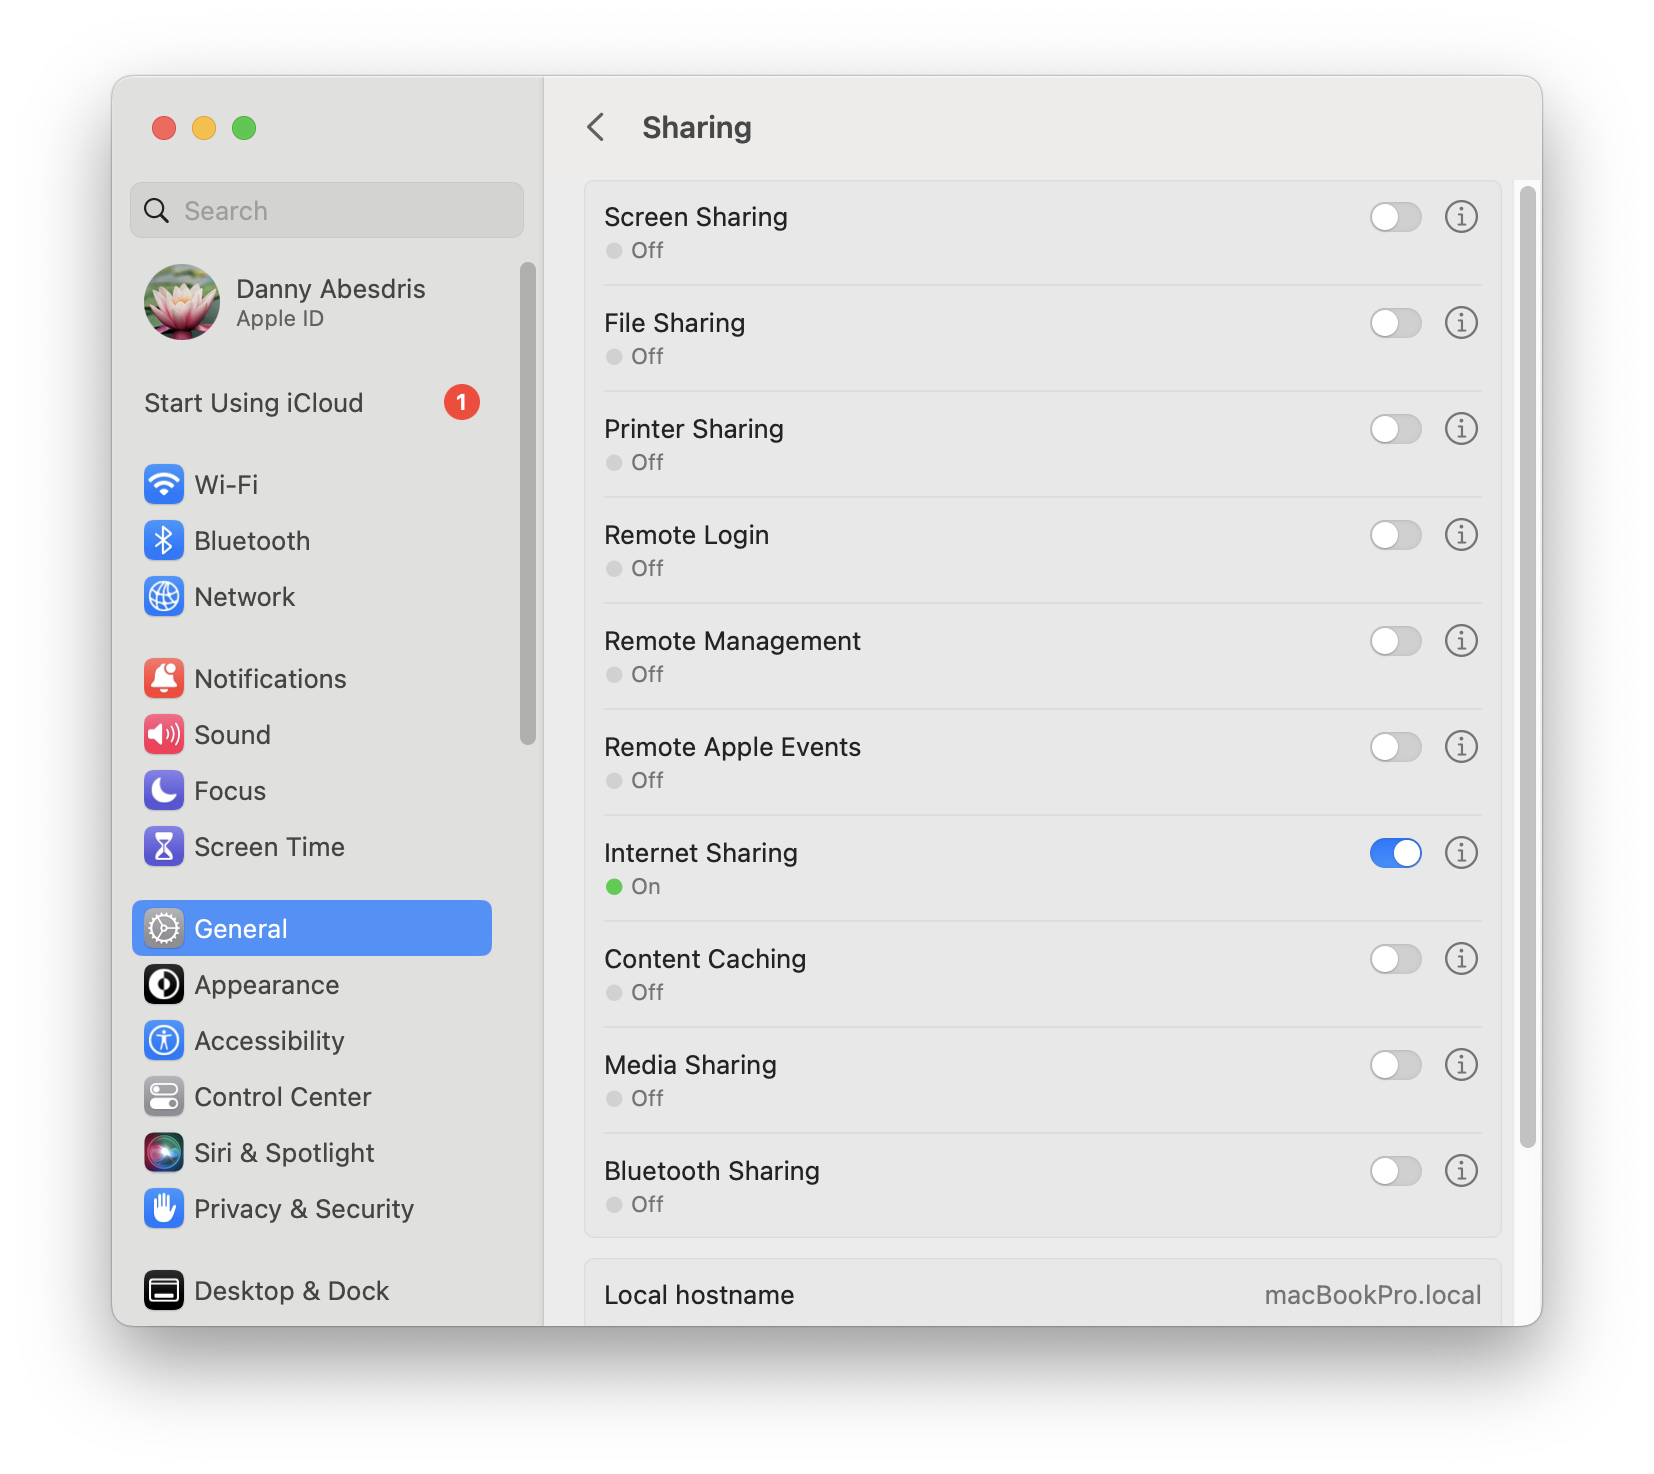
 STEP 3: Next, click on Sharing
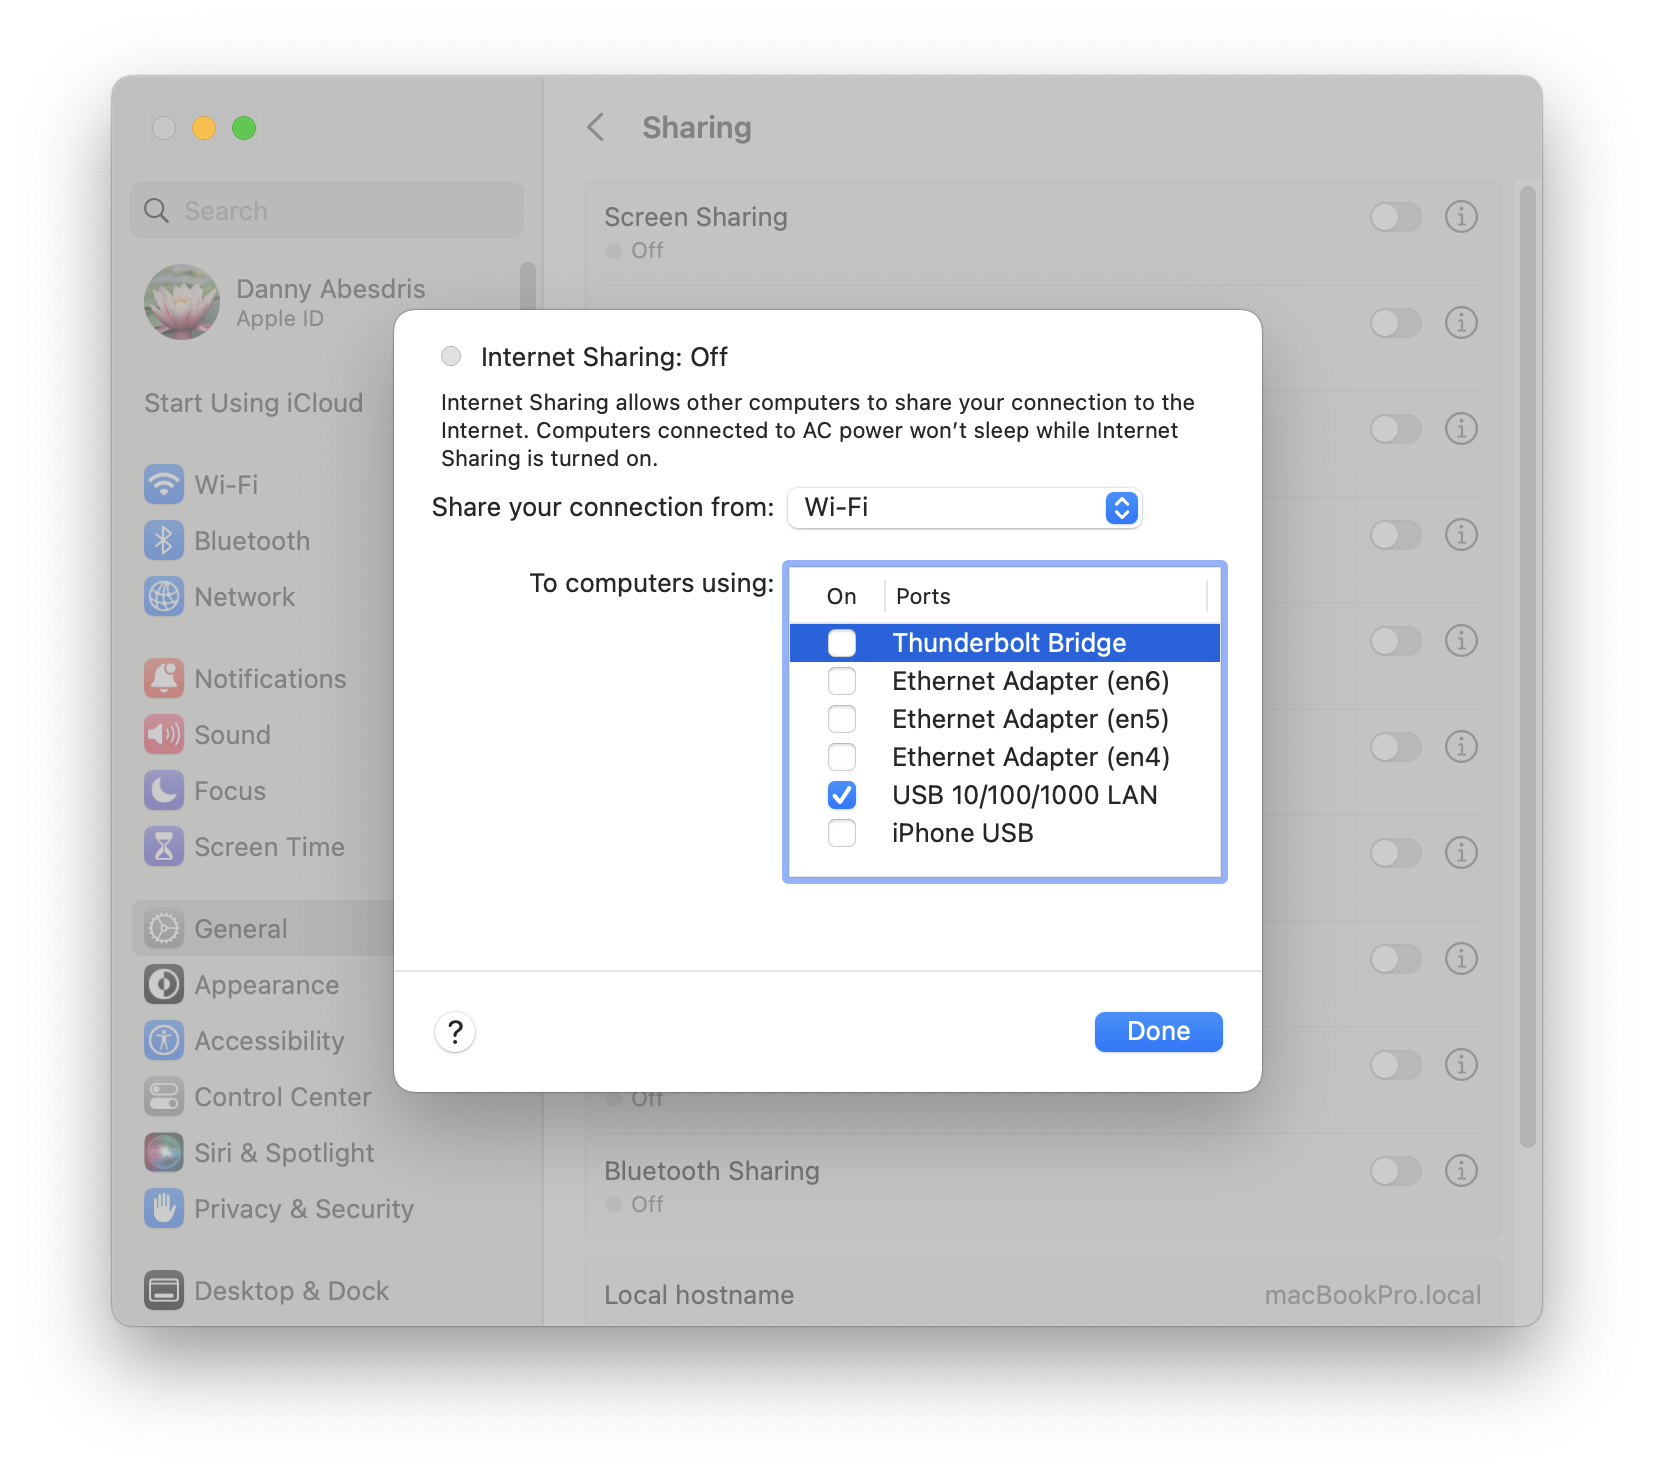
 STEP 4: Now, to the right of the curently deactivated toggle switch for
"Internet Shraing", click on the information/settings icon (circle containing the letter i).
Make sure that the "Share your connection from:" is set to the mode (Wifi or Ethernet) for your
currently active internet connection and in the "To computers using:" window, select (check) the
box for your newly inserted adapter (for UGreen USB-C to ethernet adapter, it should be listed
as: AX88197A) AND also check the box for Thunderbolt Bridge.
STEP 4: Now, to the right of the curently deactivated toggle switch for
"Internet Shraing", click on the information/settings icon (circle containing the letter i).
Make sure that the "Share your connection from:" is set to the mode (Wifi or Ethernet) for your
currently active internet connection and in the "To computers using:" window, select (check) the
box for your newly inserted adapter (for UGreen USB-C to ethernet adapter, it should be listed
as: AX88197A) AND also check the box for Thunderbolt Bridge.
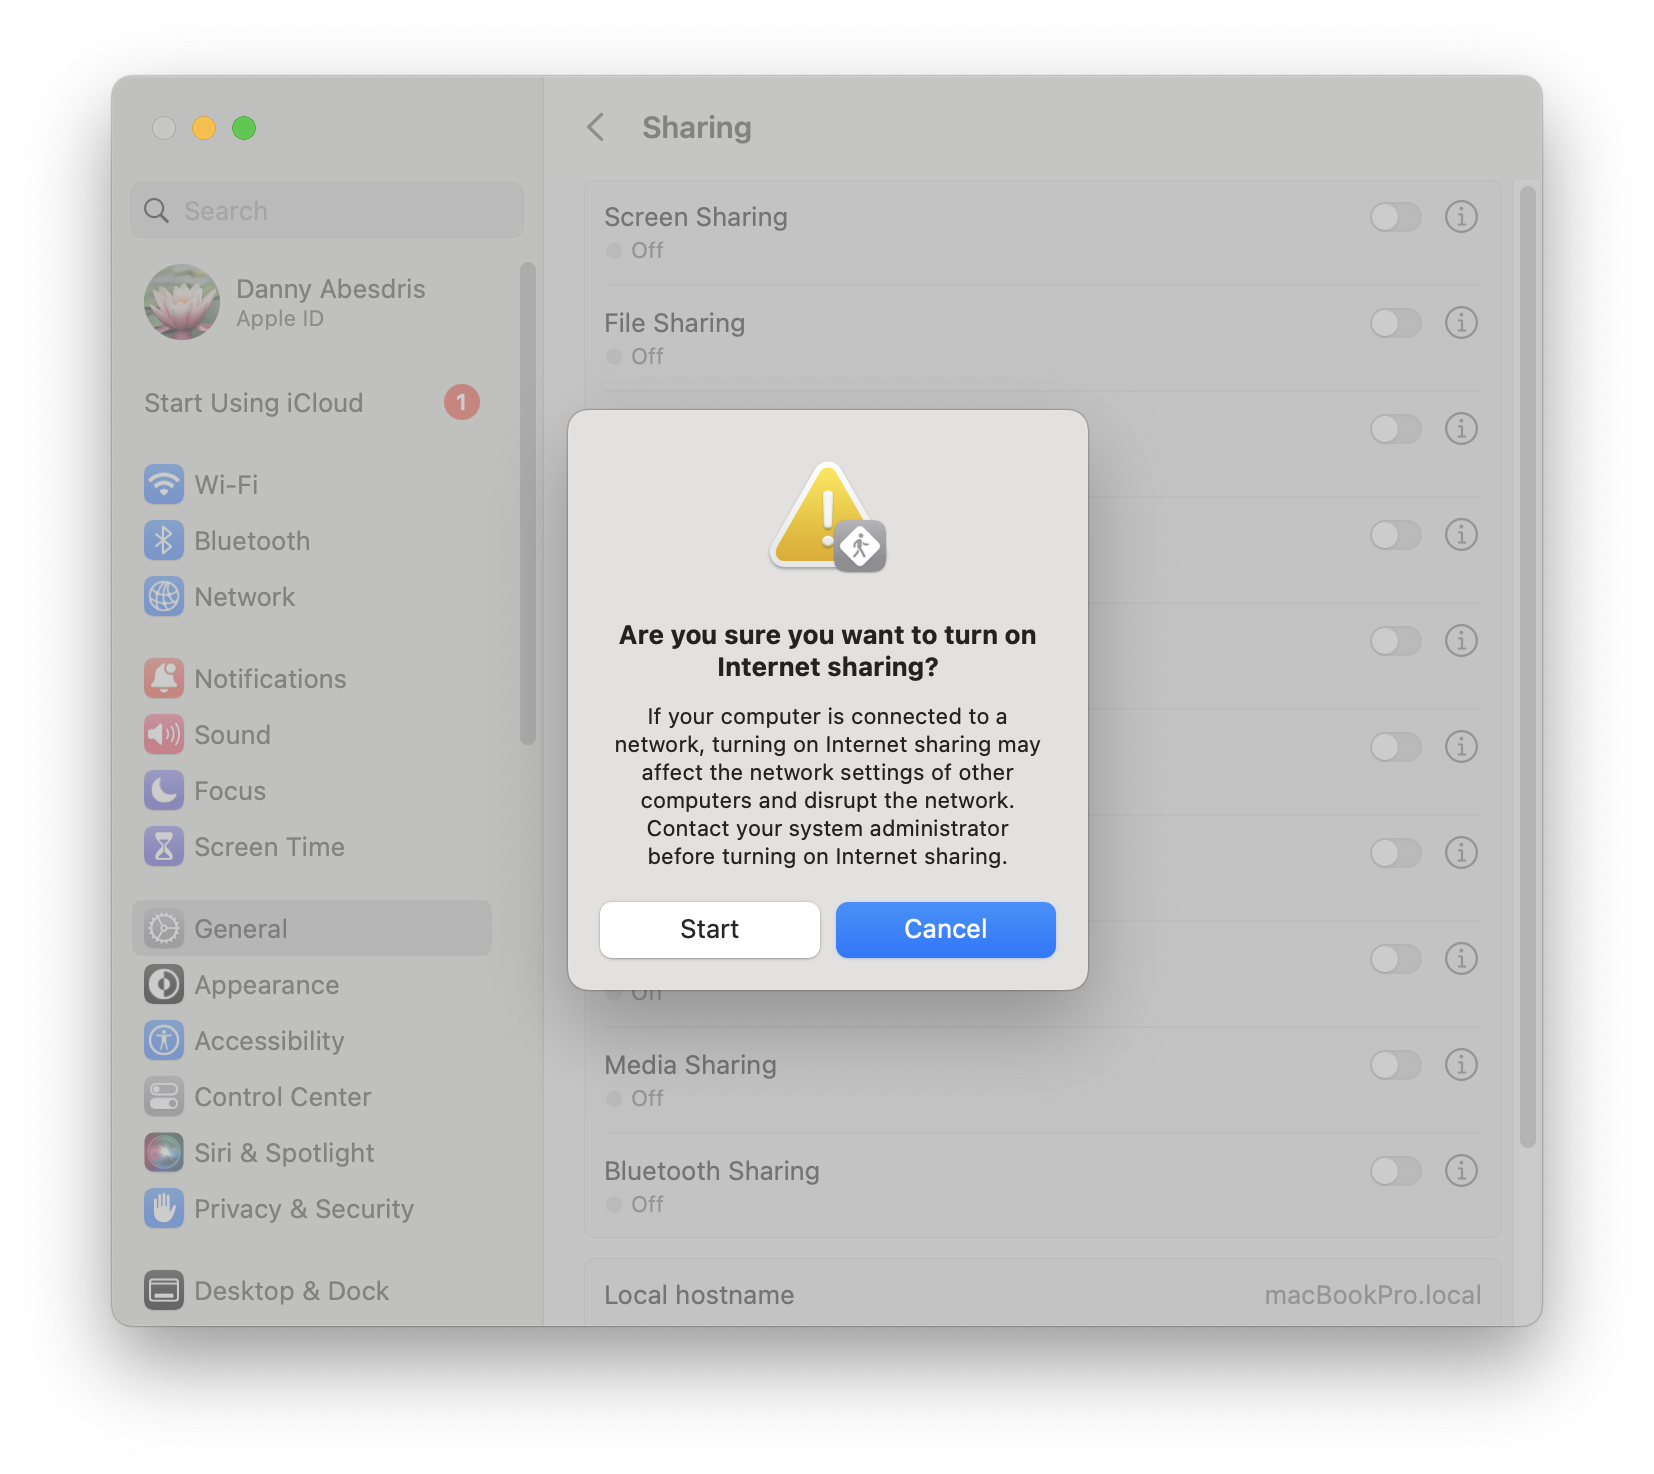
 STEP 5: Now, select Done and then turn on Internet Sharing by clicking on the
toggle switch icon and then select the Start button.
The Internet Sharing LED (on the panel) should be lit up in green.
STEP 5: Now, select Done and then turn on Internet Sharing by clicking on the
toggle switch icon and then select the Start button.
The Internet Sharing LED (on the panel) should be lit up in green.
 STEP 6: Now, open a terminal on your Mac and enter the command: ifconfig
If the sharing operation was successful, you should see a listing for: bridge101: with and ip address of
192.168.3.1 or 192.168.2.1.
The dynamically allocated ip address for your Raspberry Pi would then be either:
192.168.3.2 or 192.168.2.2.
STEP 6: Now, open a terminal on your Mac and enter the command: ifconfig
If the sharing operation was successful, you should see a listing for: bridge101: with and ip address of
192.168.3.1 or 192.168.2.1.
The dynamically allocated ip address for your Raspberry Pi would then be either:
192.168.3.2 or 192.168.2.2.
 STEP 7: Now (again from the Terminal), open a connection to the Raspberry Pi
with: ssh pi@voyagerPi.local and after entereing your password, you should be logged in to the
Raspberry Pi.
STEP 7: Now (again from the Terminal), open a connection to the Raspberry Pi
with: ssh pi@voyagerPi.local and after entereing your password, you should be logged in to the
Raspberry Pi.
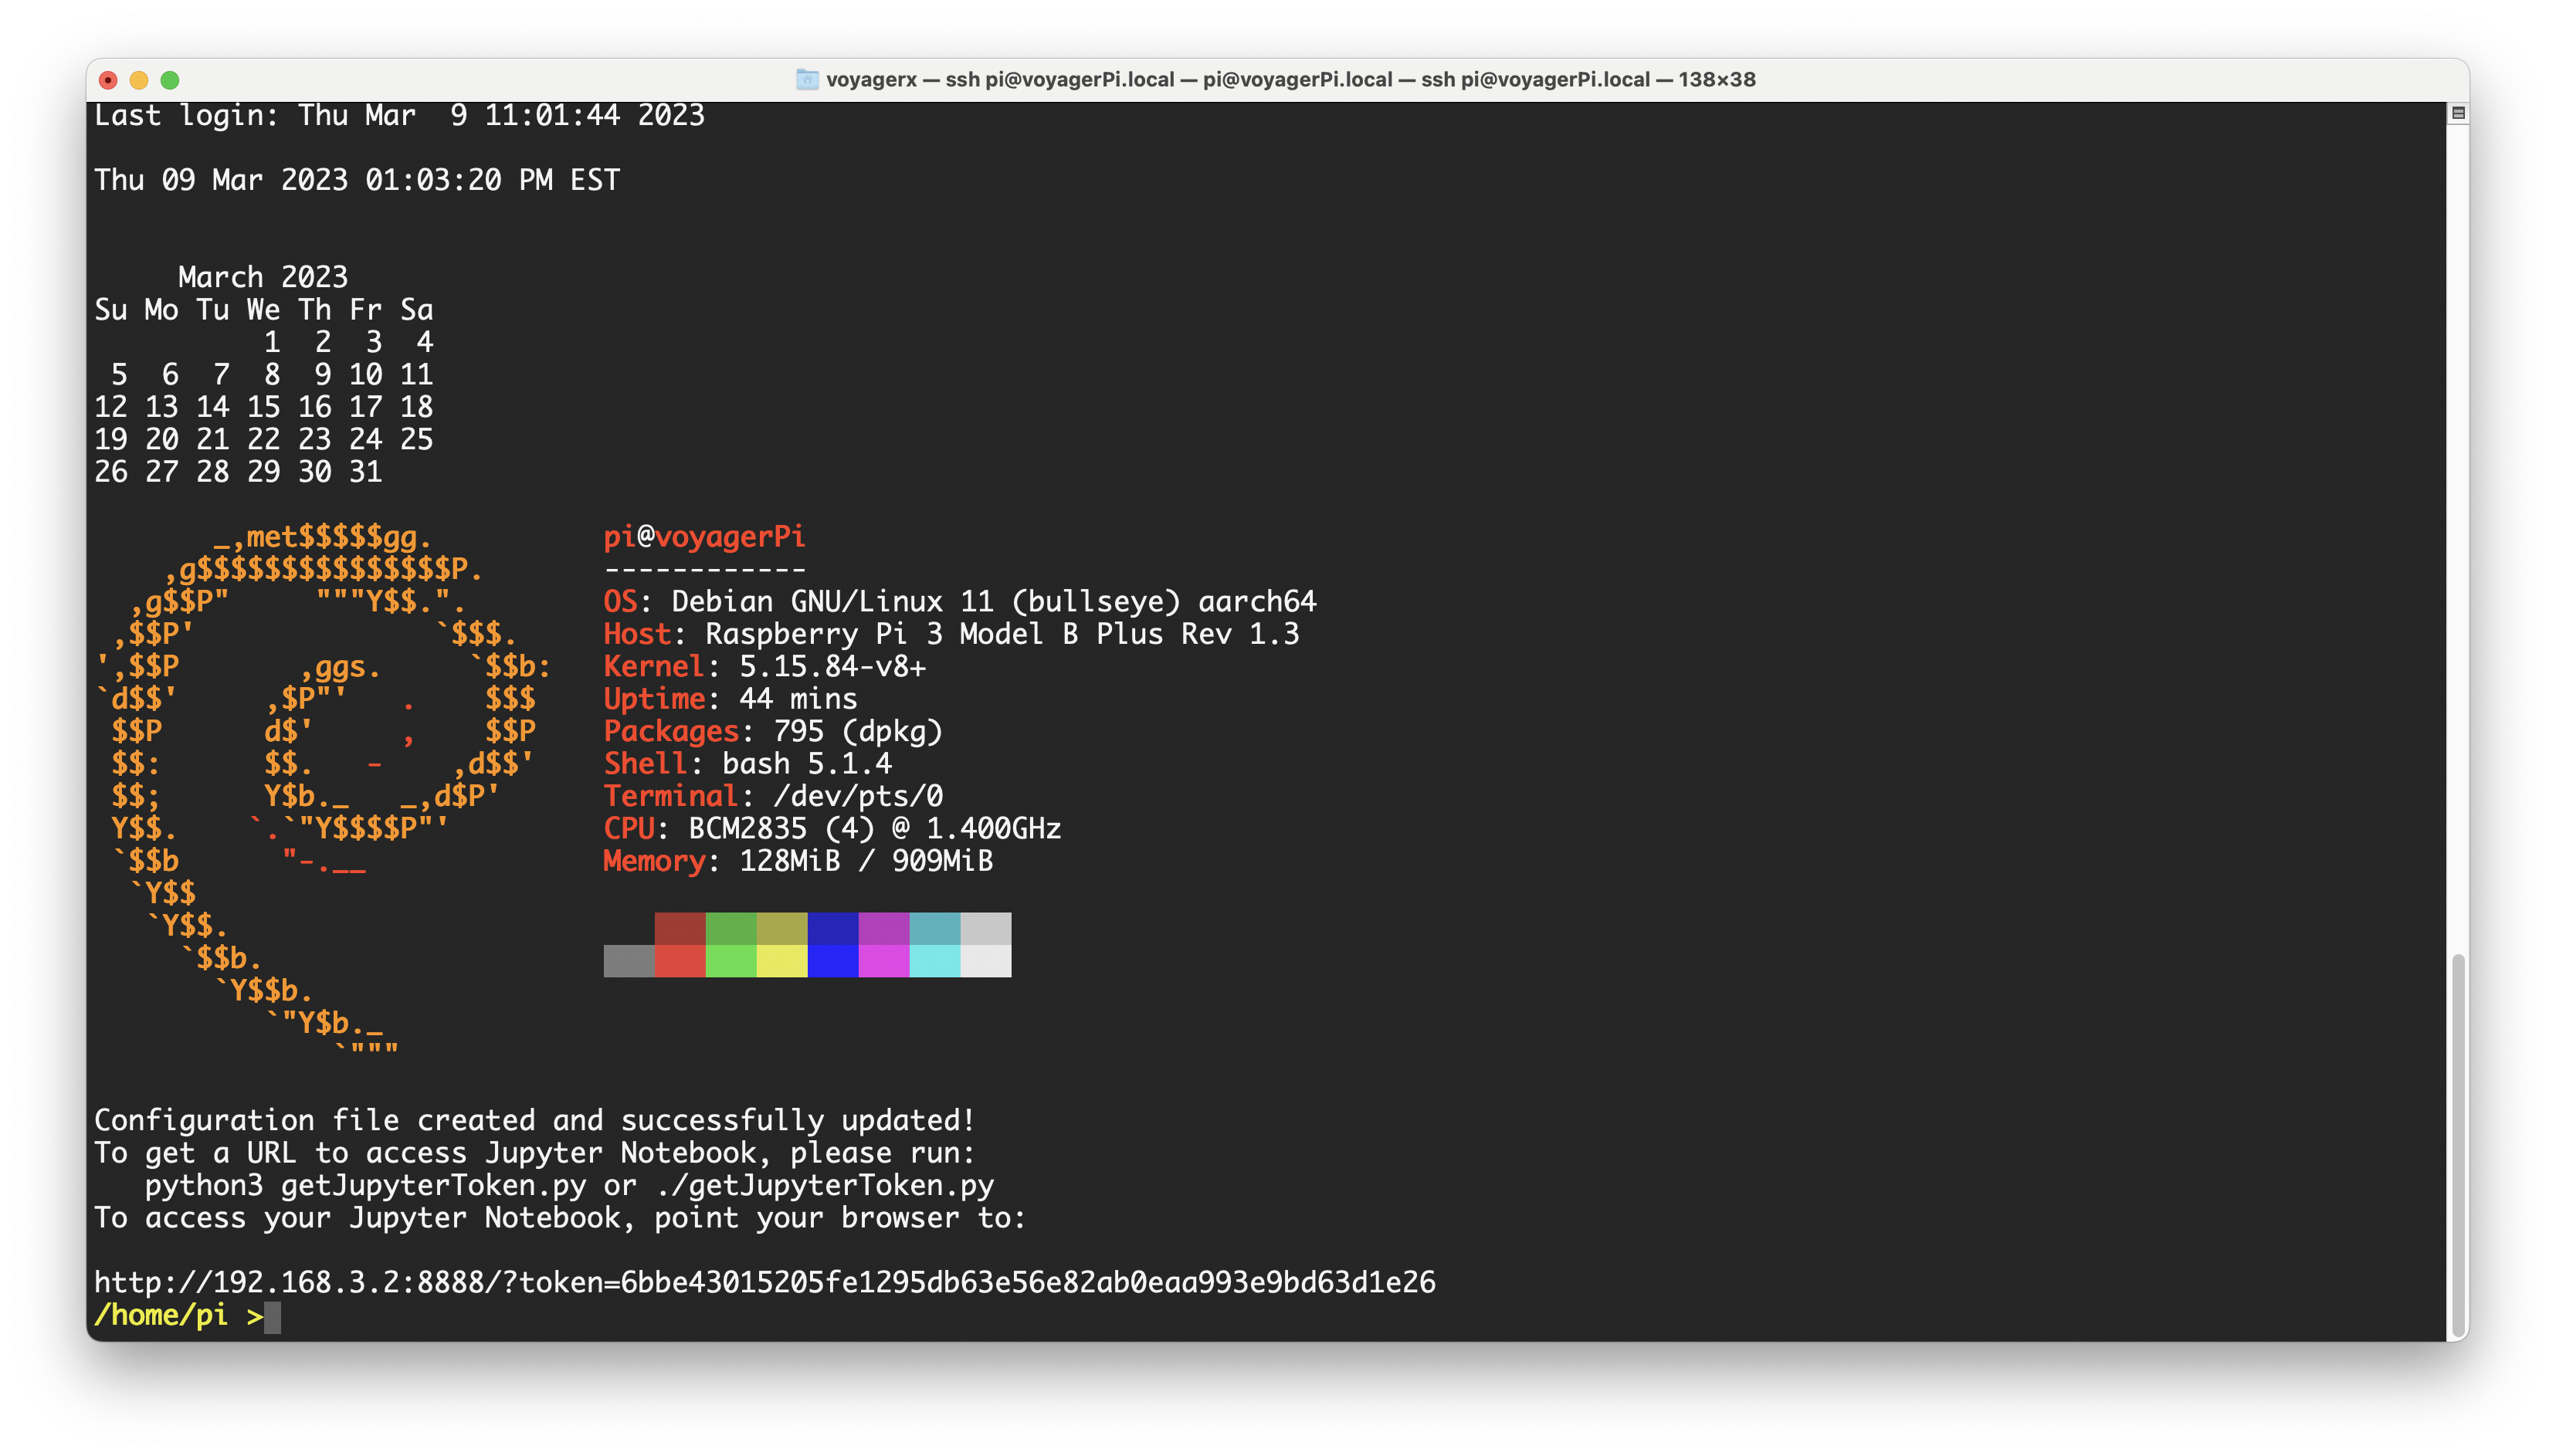 If the connection was successful, you should be logged in as user pi.
Now, issuing the command: hostname -I
will display the internal (local) ip address that was automatically assigned to your Raspberry Pi
from the Mac OS X Sharing protocol.
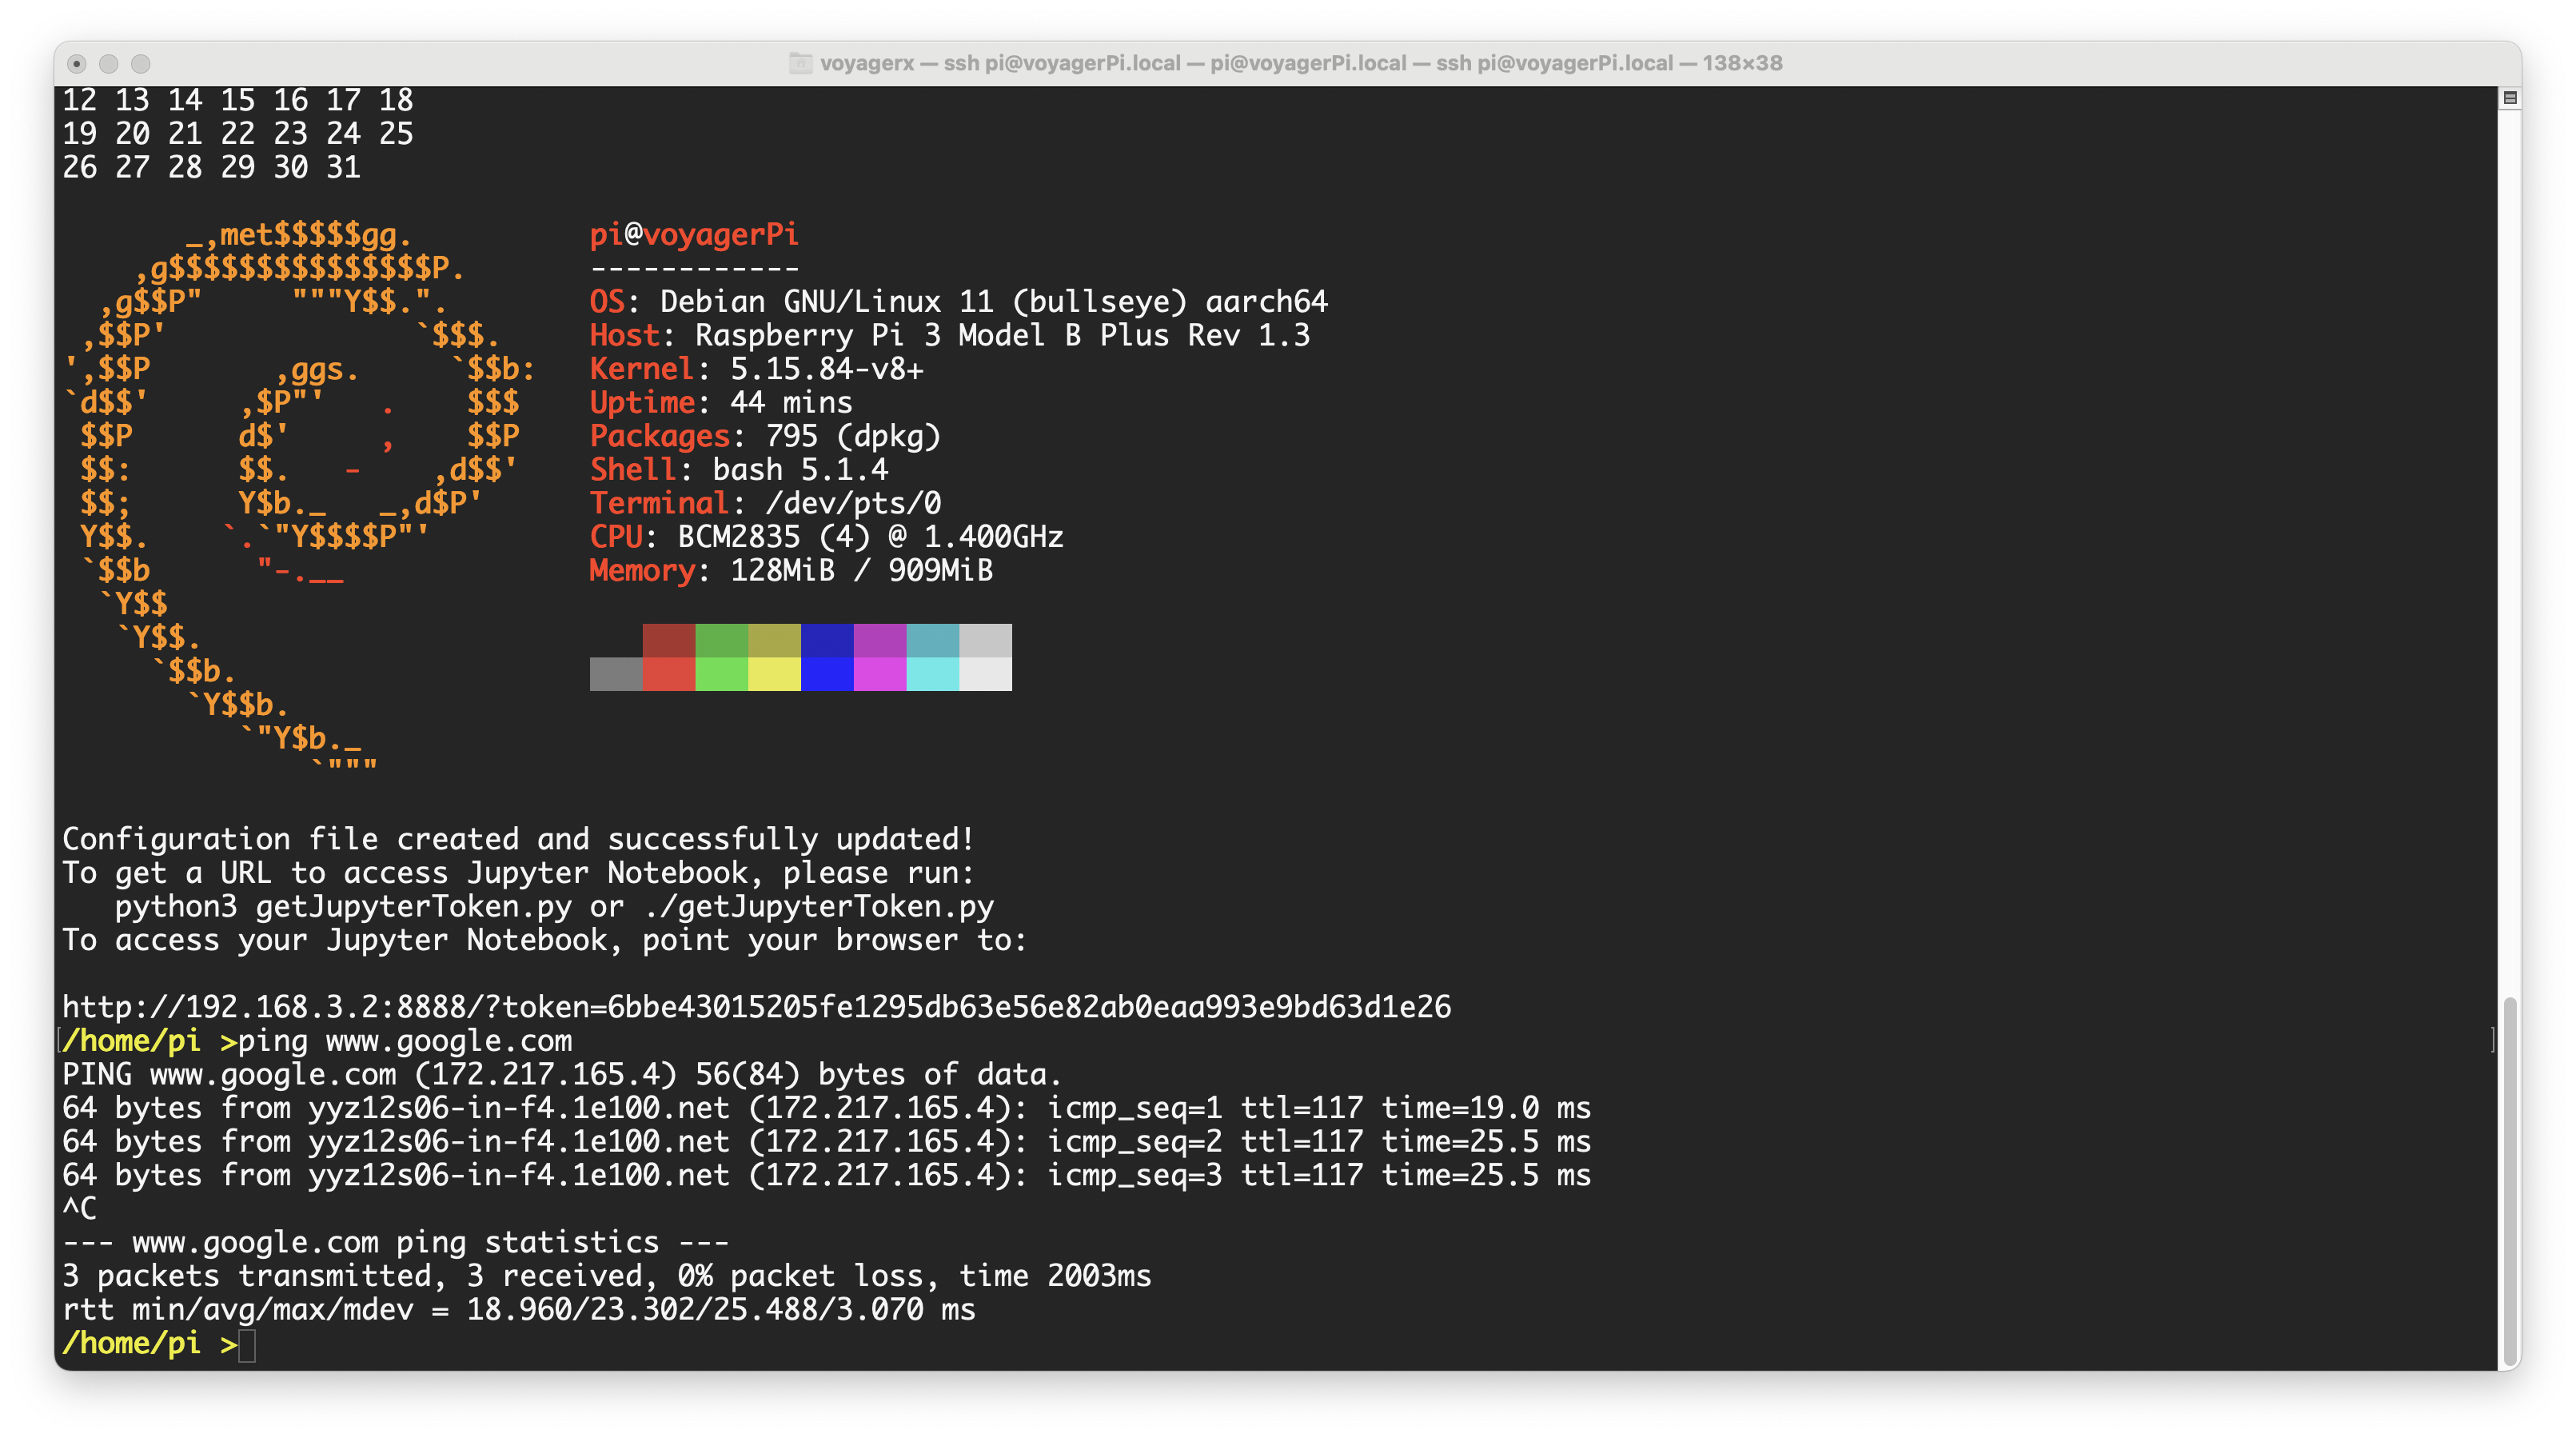
This ip address will be network translated so that outside connections to the internet
will be allowed using the interface shared by Mac OS X.
For example, issuing the command: ping www.google.com will yield:
If the connection was successful, you should be logged in as user pi.
Now, issuing the command: hostname -I
will display the internal (local) ip address that was automatically assigned to your Raspberry Pi
from the Mac OS X Sharing protocol.
This ip address will be network translated so that outside connections to the internet
will be allowed using the interface shared by Mac OS X.
For example, issuing the command: ping www.google.com will yield:
 And to ensure that the correct Python version is being used, use the command: python3 -V
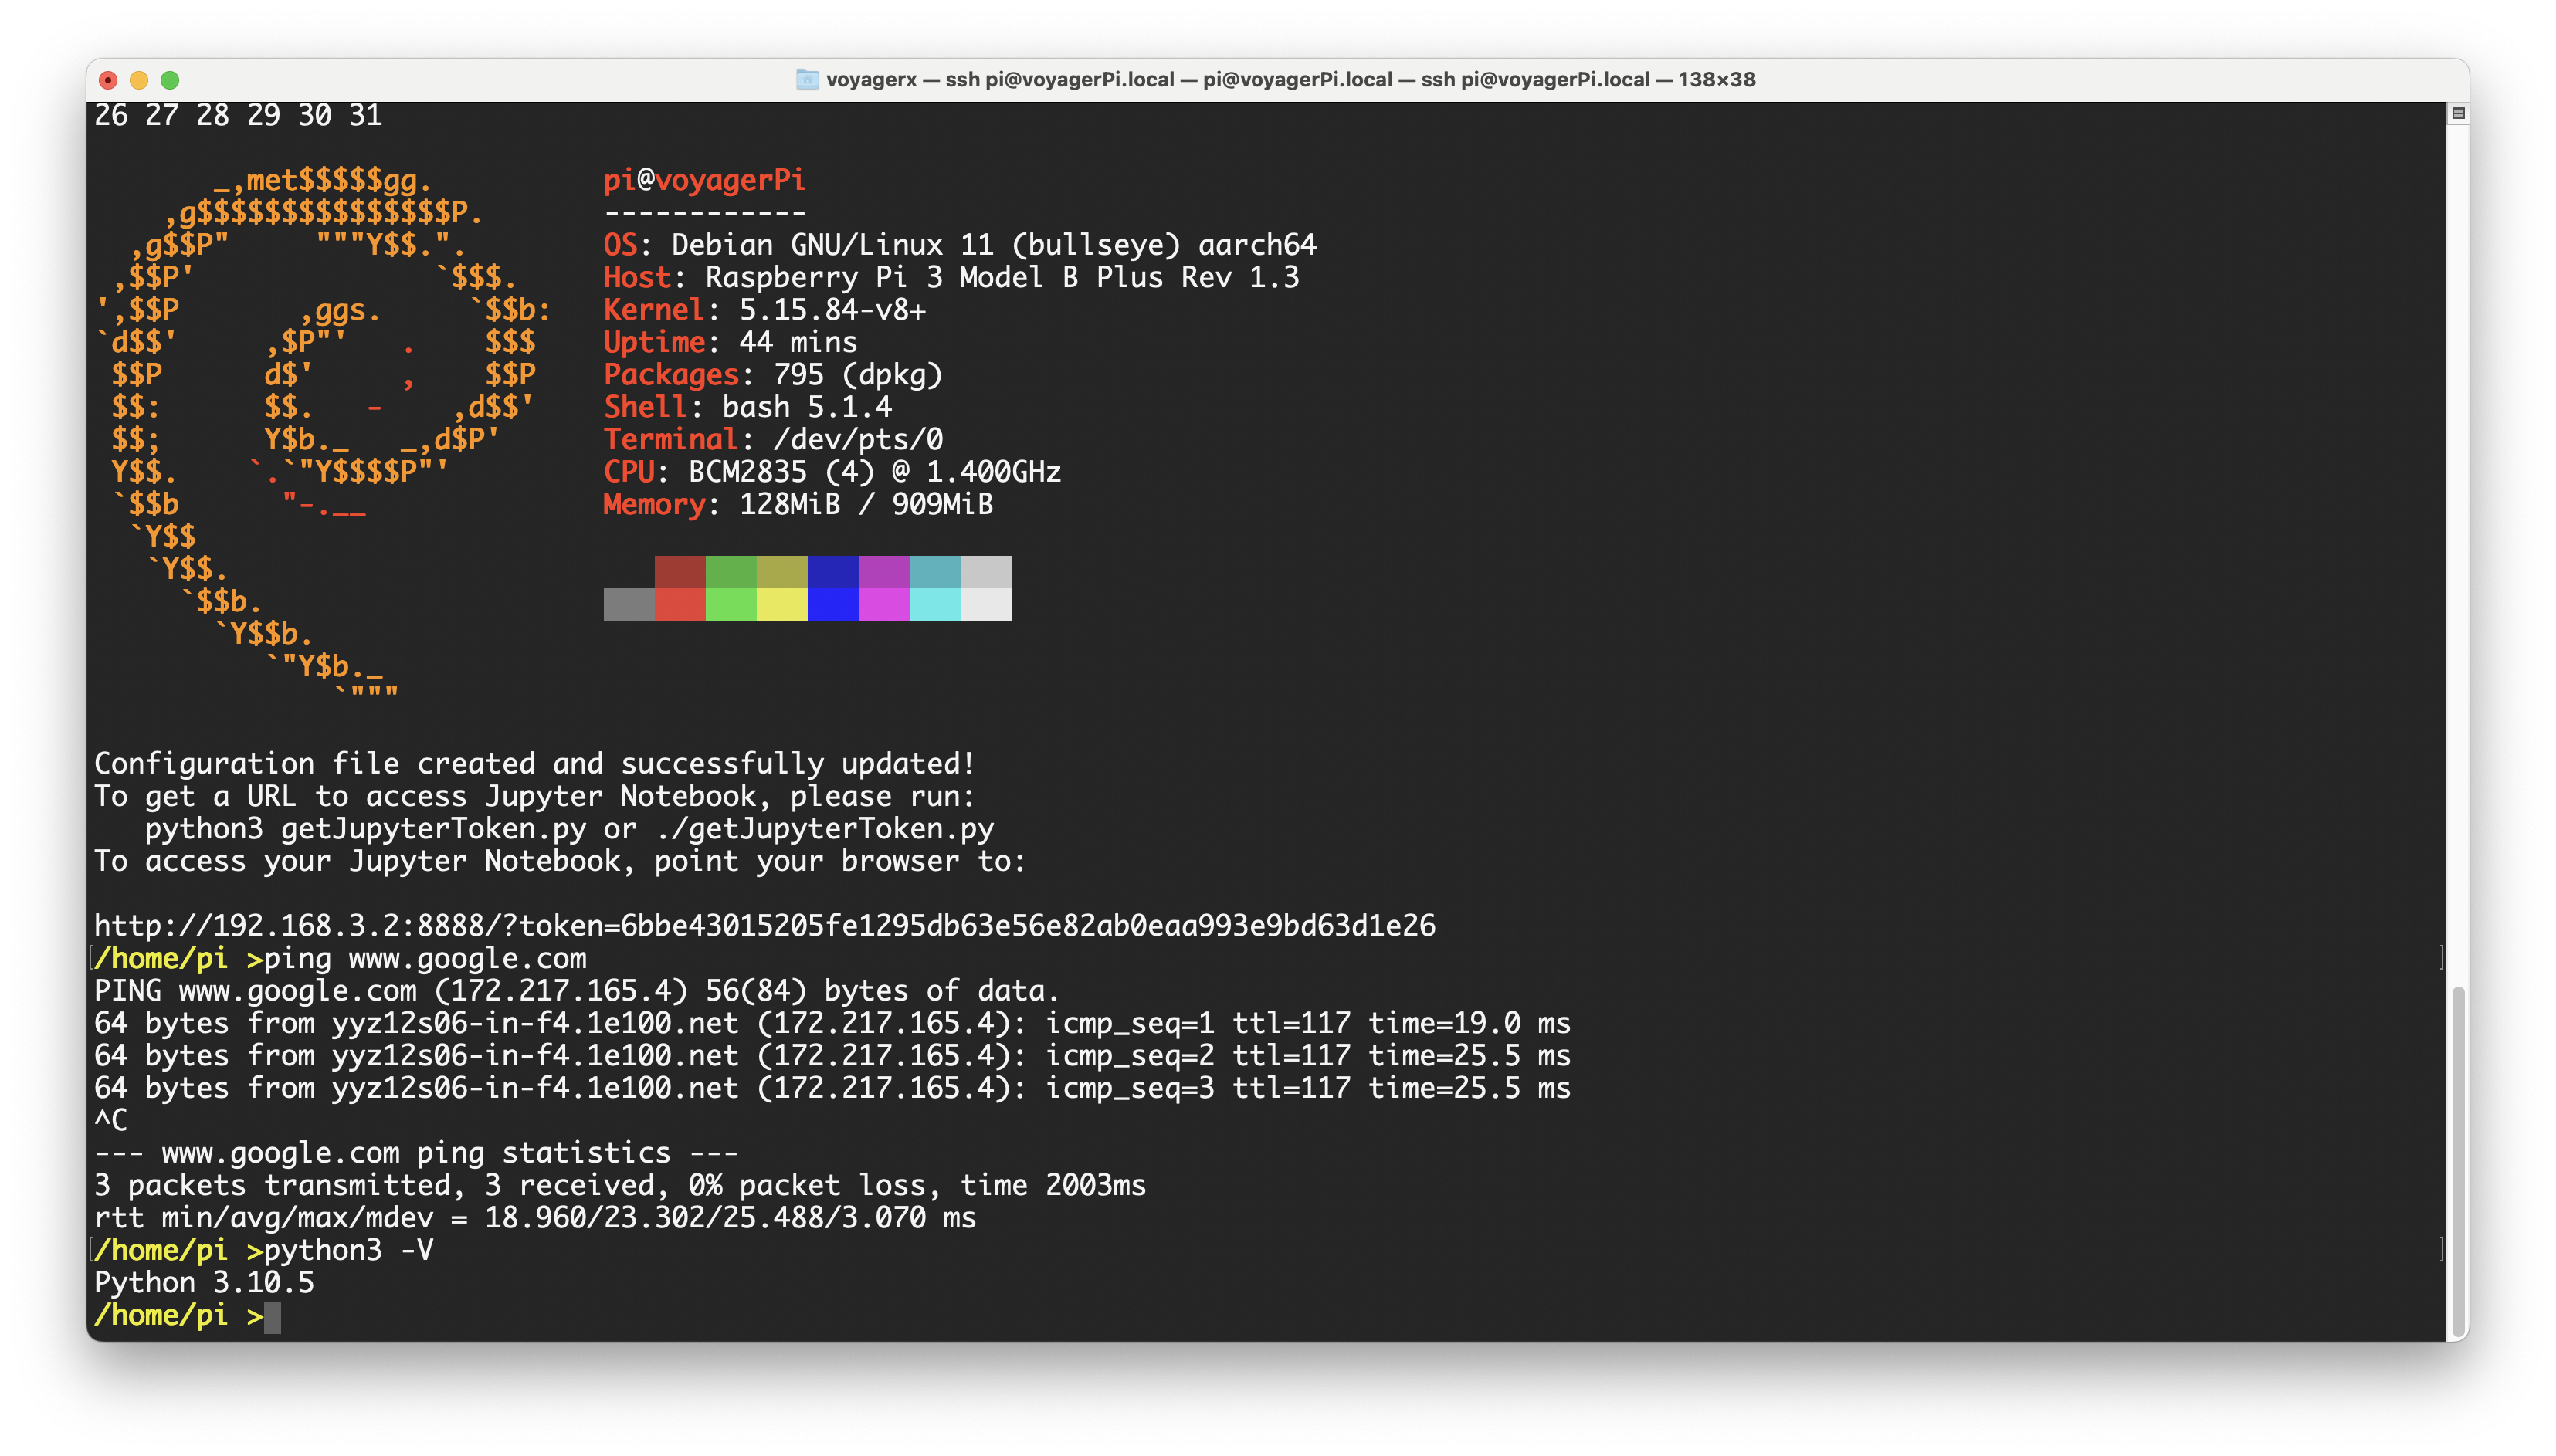 If the version of python3 displayed is: 3.10.5, then everything is correct.
You will now be able to access your Raspberry Pi and the internet via a direct Wifi/ethernet
connection from your Mac!
If the version of python3 displayed is: 3.10.5, then everything is correct.
You will now be able to access your Raspberry Pi and the internet via a direct Wifi/ethernet
connection from your Mac!

